Manage custom roles
With Custom Roles, you can define granular permissions in Temporal Cloud, giving your team precise control over who can perform specific actions within your account.
What are Custom Roles?
Custom Roles enable you to define your own roles as bundles of permission primitives (operations/actions) scoped to Temporal Cloud resources (Account, Namespace, Nexus Endpoint, or Connectivity Rule) and assign them to any principal (user, group, service account).
Why use Custom Roles?
Use Custom Roles when you need more granular access control than the predefined roles provide. Common use cases include:
- Least-privilege access: Grant users only the permissions they need to perform their job functions.
- Delegated administration: Allow teams to manage specific Temporal Cloud resources without granting full account administration privileges.
- Service account security: Create narrowly scoped permissions for automation and integrations, reducing risk if credentials are compromised.
Custom Roles limits
For more information about the limits of Custom Roles, see Custom Roles limits.
Defining Custom Roles
Custom Roles are user-defined collections of permissions that grant access to specific Temporal Cloud resources and operations.
Permissions can be scoped to either all resources of a given type or a selected set of resources.
For example, you might want users with the Account Developer role to view all Namespaces for troubleshooting, without allowing them to modify Namespace configuration.
To do this, create a Custom Role named NamespaceGlobalReadOnly that grants:
cloud.namespace.list, scoped to the Cloud Accountcloud.namespace.get, scoped to all Namespace resources
A principal (user, user group, or service account) must have a predefined account role (such as developer, or read). Custom Roles define a set of granular permissions and assign them alongside the predefined role. The effective access is the union of both. You cannot use custom roles to narrow down or remove permissions from a predefined role. You also cannot replace a pre-defined role with a custom role.
Delegating Custom Roles
Custom role administration defaults to the Account Owner, but can be delegated. Account Owners are the primary principals that can manage Custom Roles (that is, they can create, list, update, delete, or assign a Custom Role).
Account Owners can delegate Custom Role administration to other roles such as Global Admin, but this comes with risk. If the Account Owner creates a Custom Role that includes the ability to create, update, or assign Custom Roles, and assigns that role to any other principal, such as Global Admin or Developer, users with that new role can create or modify roles with otehr operations and assign them to themselves or others.
By default, only the Account Owner can create or assign Custom Roles. The Account Owner can create roles that have permission to create, modify, or assign roles. If the Account Owner assigns these roles to another user, that user will have the ability to create or modify roles. This leads to privilege escalation risk where a user would have the ability to assign themselves or others to a role with any operations, even ones they're not approved for.
The following operations present risk when delegated:
cloud.customrole.createcloud.customrole.updatecloud.customrole.assign
Available permissions
Most of the Control Plane operations listed in the API references (HTTP, GRPC) can be assigned to a Custom Role. For the operations that are supported by Custom Roles, see this table.
Create Custom Roles
- Cloud UI
- Cloud Operations API
- Terraform
- Cloud CLI
To create a Custom Role from the Web UI, select Settings in the left sidebar, and then click the Custom Roles tab on the Settings page.
On the Custom Roles tab, you'll see a list of the roles that have already been defined for your account, 50 to a page. Click the three dots menu to view details about an existing Custom Role, or to edit or delete that role.
Click the Create Custom Role button to create a new role. On the Create Custom Role page, give the Custom Role a name, and optionally a description.
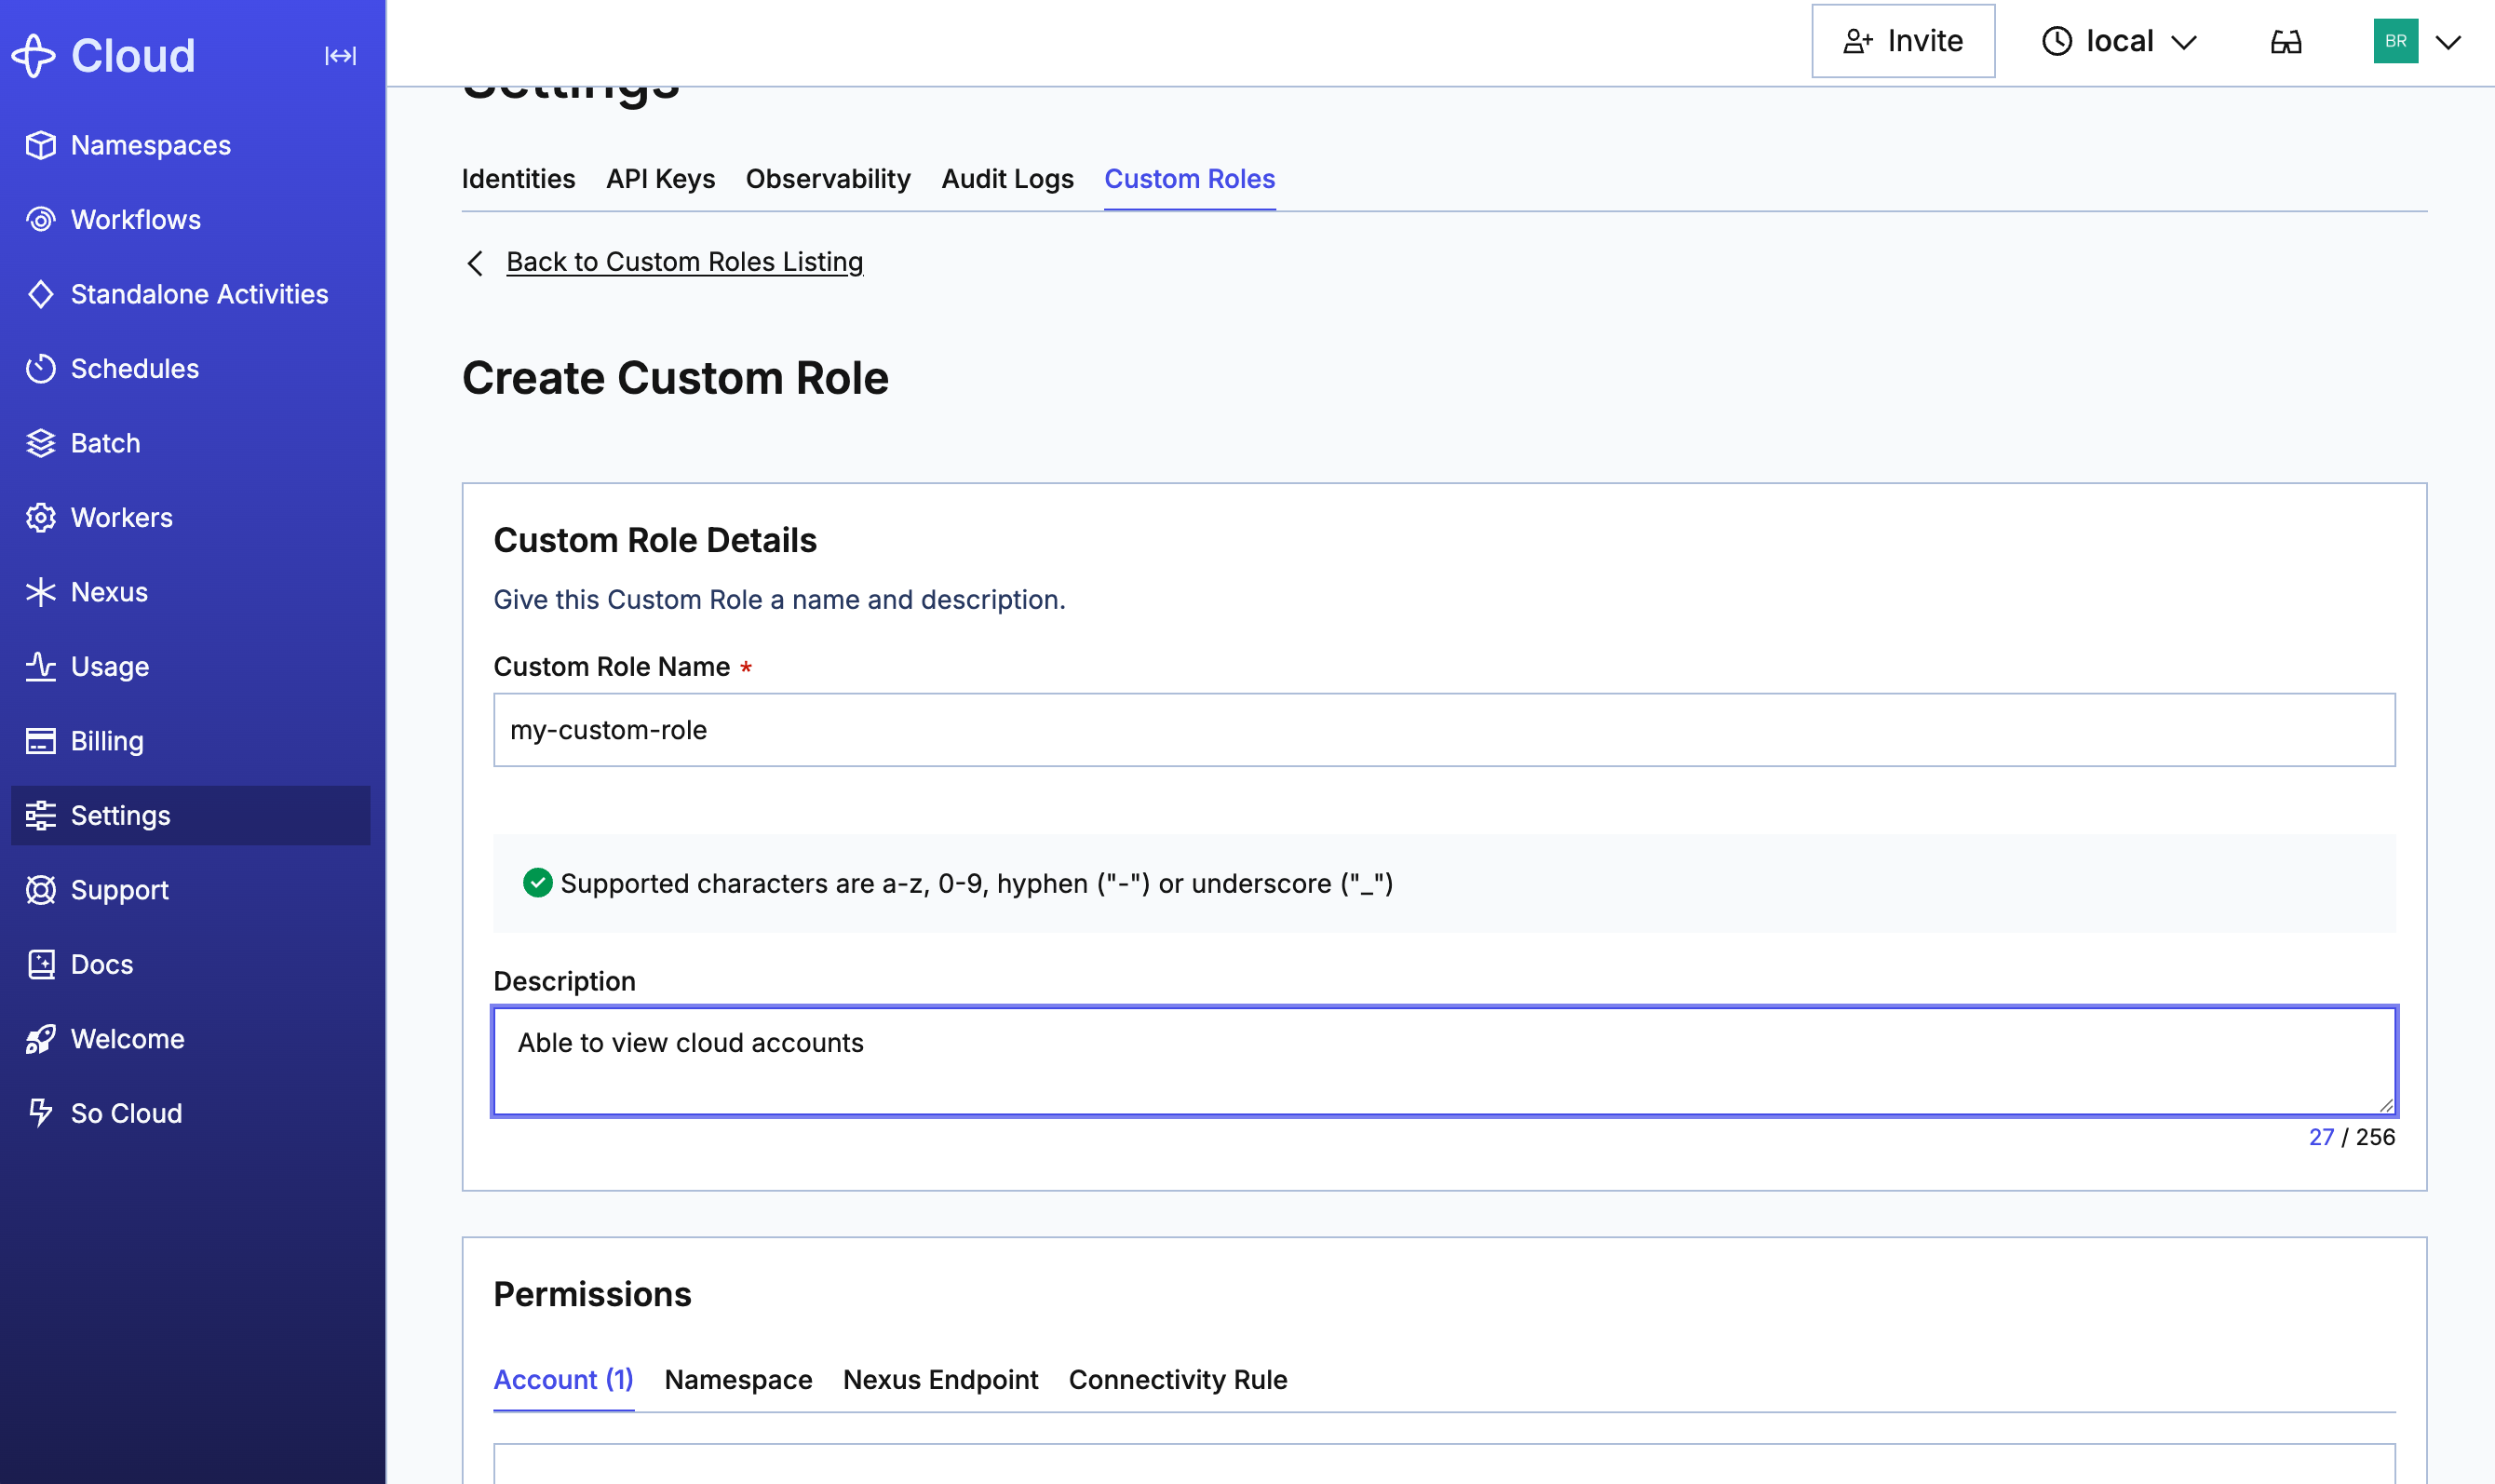
In the Permissions section, you'll assign the appropriate resources and its permissions. The following resources are available for Custom Roles:
- Account: Permissions scoped to the current account, listed by type.
- Namespace: Permissions scoped to the selected Namespace, listed by type. You can only assign permissions to Namespaces to which you have access.
- Nexus Endpoint: Permissions scoped to the selected Nexus Endpoint, listed by type. You much have at least one Nexus Endpoint enabled before you can assign Nexus Endpoint permissions to a Custom Role.
- Connectivity Rules: Permissions scoped to the selected Connectivity Rules, listed by type.
Account-level permissions apply to the current account. For each of the other resources, you'll need to first select the resource that you want to grant permissions for. Once you select a resource, the list of available permissions will appear, and you can turn them on or off as desired.
At the bottom of the Account tab are permissions that relate to Custom Roles. Here, you can define whether members of the Custom Role you're creating will be able to create, update, or delete Custom Roles.
When you're done assiging permissions to resources, click Create Custom Role at the bottom of the page.
Use the CreateCustomRoleRequest API call to create a Custom Role.
The structure of the CreateCustomRoleRequest is defined by a JSON spec, as follows:
{
  "name": "my-role-name"
  "description": "Optional description",
  "permissions": [
    {
      "resources": {
        "resource_type": "namespace",
        "allow_all": true
      },
      "actions": ["cloud.namespace.get"]
    }
  ]
}
This example creates a Custom Role with the defined spec.
The example shown here creates a role named my-role-name and grants the ability to create projects in all Namespaces.
The request returns a RoleID.
The following constraints apply to the request:
- Name constraints:
- A name is required, with a maximum of 64 characters
- The following characters are allowed: letters (a-z, A-Z), numbers (0-9), hyphens (-), underscores (_)
- Names are not unique per account, meaning two different roles can share the same name
- Description constraints:
- A description is optional, with a maximum of 256 characters
- Permissions constraints:
- At least one permission is required
- A Custom Role can contain up to 20 permissions. See Custom Roles limits.
Permission Structure
Each permission has two parts: actions and resources.
- Resource Types & Scoping Behavior
| Resource Type | Scoping Behavior |
|---|---|
| account | Account-level; no specific resource ID needed |
| Namespaces | Scoped to specific Namespace IDs, or allow_all: true for all Namespaces |
| Nexus endpoints | Scoped to specific Nexus endpoint IDs, or allow_all: true for all Nexus endpoints |
| connectivity rules | Scoped to specific connectivity rule IDs, or allow_all: true for all connectivity rules |
Resource IDs must exist in your account. Specifying an unknown resource ID will return an error.
Either allow_all: true or resource_ids must be set, not both.
For a list of available actions, see the list of Custom Role permissions.
- Account-scoped actions (resource_type: "accounts")
- Namespace-scoped actions (resource_type: "namespaces")
- Nexus endpoint-scoped actions (resource_type: "nexus_endpoints")
- Connectivity rule-scoped actions (resource_type: "connectivity_rules")
The following example allows read access to specific Namespaces.
The action is cloud.namespace.get, the resource type is namespaces, and the list of resource IDs is specified.
{
    "actions": ["cloud.namespace.get"],
    "resources": {
      "resource_type": "namespaces",
      "resource_ids": ["my-namespace.account-id"]
    }
  }
The following example assigns multiple permissions to one Role.
The permissions are assigned in an array, with the action cloud.namespace.get granted for all Namespaces, and cloud.user.list granted for all accounts.
 {
    "spec": {
      "name": "ns-reader-user-lister",
      "description": "Can read namespaces and list users",
      "permissions": [
        {
          "actions": ["cloud.namespace.get"],
          "resources": { "resource_type": "namespaces", "allow_all": true }
        },
        {
          "actions": ["cloud.user.list"],
          "resources": { "resource_type": "accounts", "allow_all": true }
        }
      ]
    }
  }
For more information about the Custom Role and CustomRoleSpec definitions, see the HTTP and/or GRPC API reference doc.
For more detailed examples on how to manage Custom Roles via Terraform, see the Terraform provider documentation for usage guidance.
The a Custom Role is defined by a JSON spec, as follows:
{
  "name": "my-role-name"
  "description": "Optional description",
  "permissions": [
    {
      "resources": {
        "resource_type": "namespace",
        "allow_all": true
      },
      "actions": ["cloud.namespace.get"]
    }
  ]
}
This example creates a Custom Role with the defined spec.
The example shown here creates a role named my-role-name and grants the ability to create projects in all Namespaces.
Save the spec to a file (such as role.json) so it can be passed via @file.
The following constraints apply to the request:
- Name constraints:
- A name is required, with a maximum of 64 characters
- The following characters are allowed: letters (a-z, A-Z), numbers (0-9), hyphens (-), underscores (_)
- Names are not unique per account, meaning two different roles can share the same name
- Description constraints:
- A description is optional, with a maximum of 256 characters
- Permissions constraints:
- At least one permission is required
- You can assign up to 25 permissions per role (account default, may vary)
Permission Structure
Each permission has two parts: actions and resources.
- Resource Types & Scoping Behavior
| Resource Type | Scoping Behavior |
|---|---|
| account | Account-level; no specific resource ID needed |
| Namespaces | Scoped to specific Namespace IDs, or allow_all: true for all Namespaces |
| Nexus endpoints | Scoped to specific Nexus endpoint IDs, or allow_all: true for all Nexus endpoints |
| connectivity rules | Scoped to specific connectivity rule IDs, or allow_all: true for all connectivity rules |
Resource IDs must exist in your account. Specifying an unknown resource ID will return an error.
Either allow_all: true or resource_ids must be set, not both.
For a list of available actions, see the list of Custom Role permissions.
- Account-scoped actions (resource_type: "accounts")
- Namespace-scoped actions (resource_type: "namespaces")
- Nexus endpoint-scoped actions (resource_type: "nexus_endpoints")
- Connectivity rule-scoped actions (resource_type: "connectivity_rules")
To create a custom role:
temporal cloud custom-role create --spec @role.json
Assigning Custom Roles to users
Once you have created a Custom Role, it is available on the Identities page to assign to a user or group, the same as the pre-defined Temporal permissions. See How to update an account-level role in Temporal Cloud for more inforamtion.
Modifying a Custom Role
- Cloud UI
- Cloud Operations API
- Terraform
- Cloud CLI
To modify a Custom Role from the Web UI, select Settings in the left sidebar, and then click the Custom Roles tab on the Settings page.
On the Custom Roles tab, you'll see a list of the roles that have already been defined for your account, 50 to a page. Click the three dots menu of the Custom Role you want to modify and select Edit.
The Edit Custom Role page has the same options as the Create Custom Role page. You can change the Custom Role's name or description, or you can modify any of the current permissions assigned to that Role.
When finished, click Update Custom Role.
To update a Custom Role, modify the temporalcloud_custom_role resource in your Terraform configuration and run terraform apply.
Updating a Custom Role replaces the full permissions list. Include all permissions you want to retain. Any permission omitted from the update will be removed.
For more details see the Terraform provider documentation.
To update a role spec by ID, use update:
temporal cloud custom-role update --role-id my-role-id --spec @role.json
You can override the resource version explicitly with --resource-version; otherwise the latest version is fetched and used.
Delete a Custom Role
- Cloud UI
- Cloud Operations API
- Terraform
- Cloud CLI
To delete a Custom Role from the Web UI, select Settings in the left sidebar, and then click the Custom Roles tab on the Settings page.
On the Custom Roles tab, you'll see a list of the roles that have already been defined for your account, 50 to a page. Click the three dots menu of the Custom Role you want to delete and select Delete. A pop-up notification will let you know that the Custom Role has been deleted.
To delete a Custom Role, remove the temporalcloud_custom_role resource block from your Terraform configuration and run terraform apply. You can also target a specific resource:
Deleting a Custom Role permanently removes it and automatically revokes it from all principals it was assigned to. This action cannot be undone.
For more details see the Terraform provider documentation.
To delete a Custom Role, use delete:
temporal cloud custom-role delete --role-id my-role-id